Battery cycling and performance validation
Validate battery
Battery profiling discharges the battery in two steps and iterate this until the exit condition is met. Sometimes there is a need for deeper investigation, for example:
- How the battery voltage changes for a more complex discharge curve
- How the battery changes during charge/discharge cycles
- How quick does a battery recover after a pulse
Battery Validation function is only available with Otii Ace Pro.
Products needed
One or more Otii Ace Pro
One or more batteries
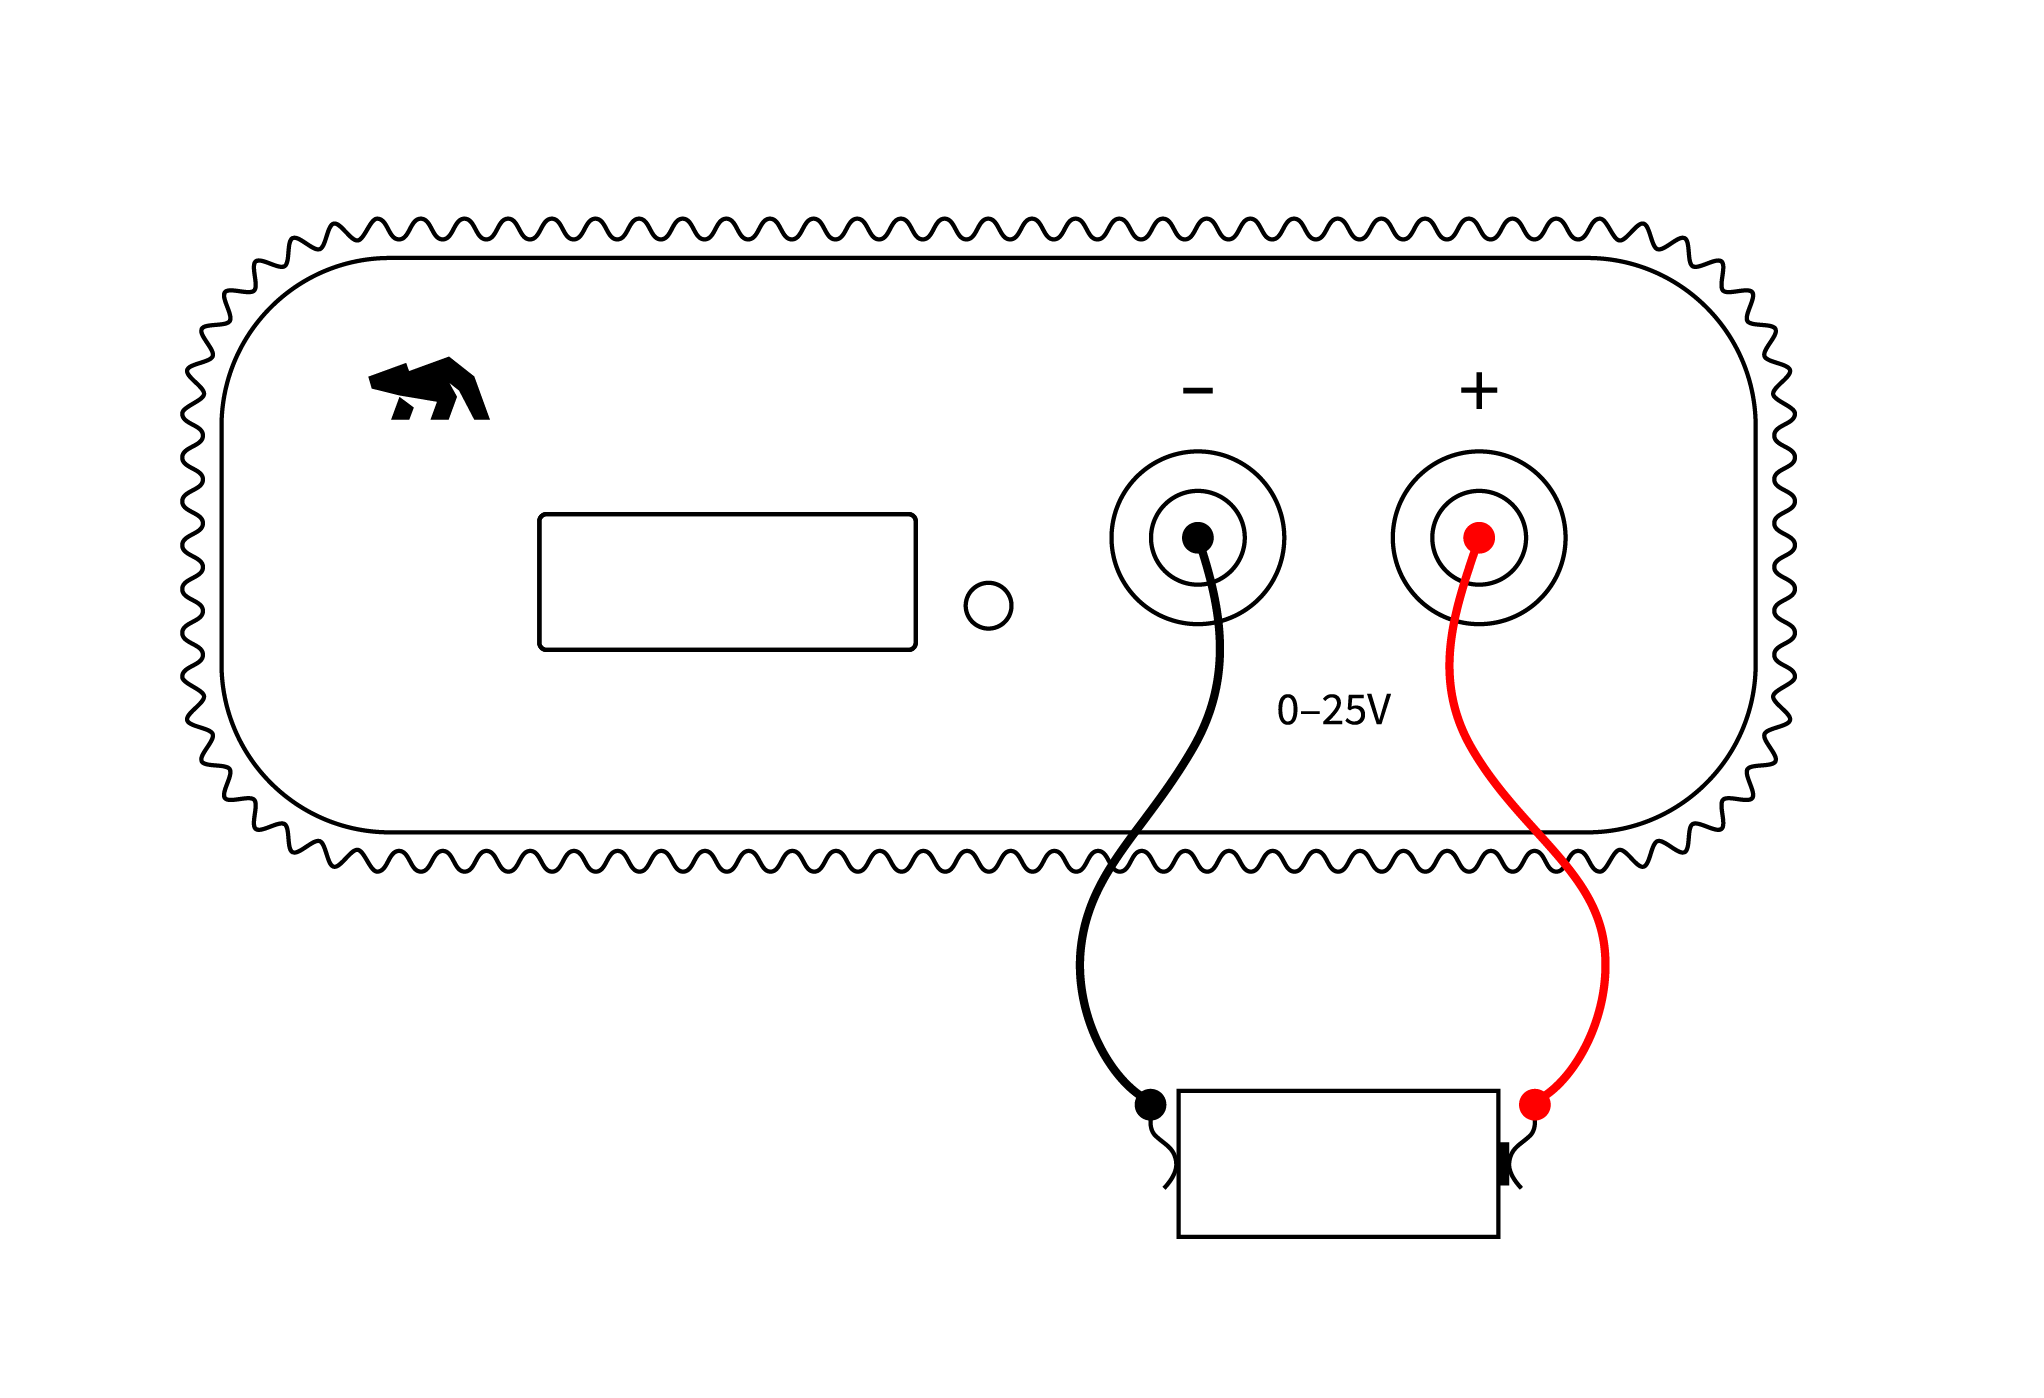
How to connect
- Repeat step 2-5 for each Ace that is to be used. Several Aces can be used at the same time to test several batteries in parallel.
- Connect the Ace to your computer by USB. If needed add a power supply.
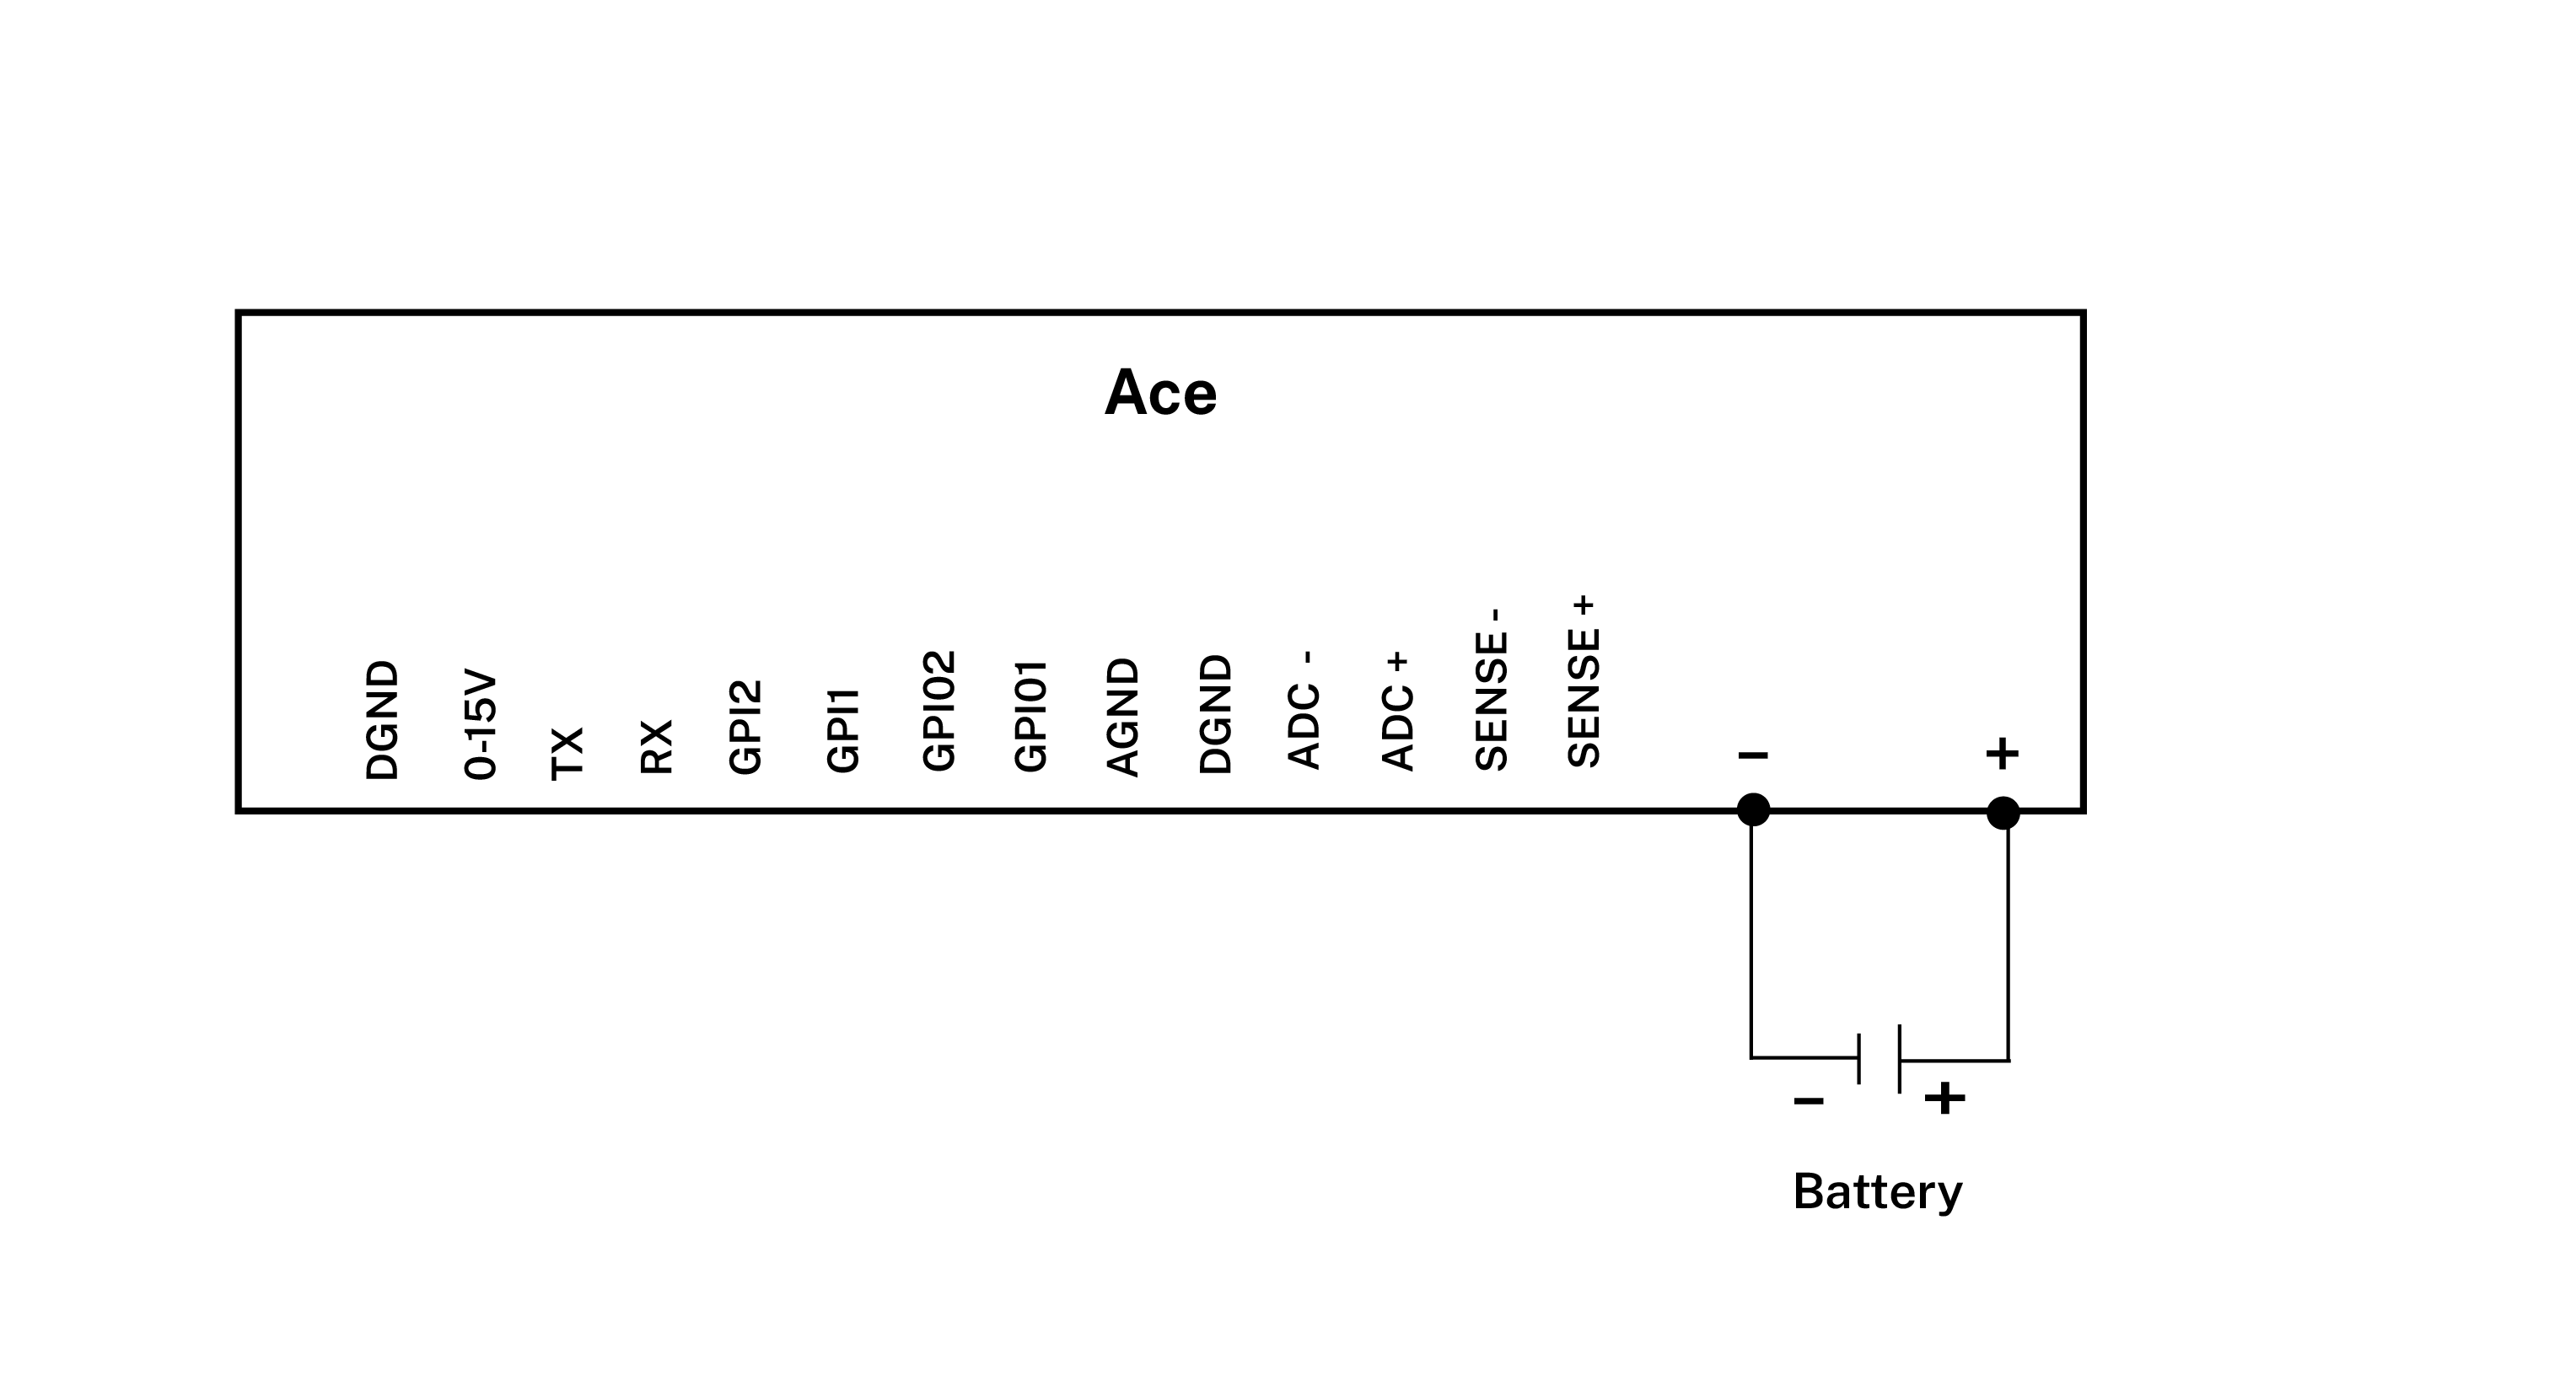
- Connect the Ace’s banana connector + to the positive battery connector.
- Connect the Ace’s banana connector – to the negative battery connector.
- Optional. For 4-wire connection, connect battery positive pole to SENSE+ and battery negative pole to SENSE- and finally AGND to SENSE-/negative battery connector.
Get started in the Otii application
- Repeat step 2-4 for each Ace that is going to be used.
- Add your Ace under Control in the sidebar. Rename it if desired (right click).
- Under ‘Channels’ enable main current, main voltage and main power channels. These will be shown as graphs.
- Set wanted sample rate. Typically, 1000 samples per seconds is enough when validating a battery since batteries typically have slow response. If a high sample rate is set and a recording is started, there will be a lot of data captured so make sure that there is enough storage on the computer to not interrupt the validation.
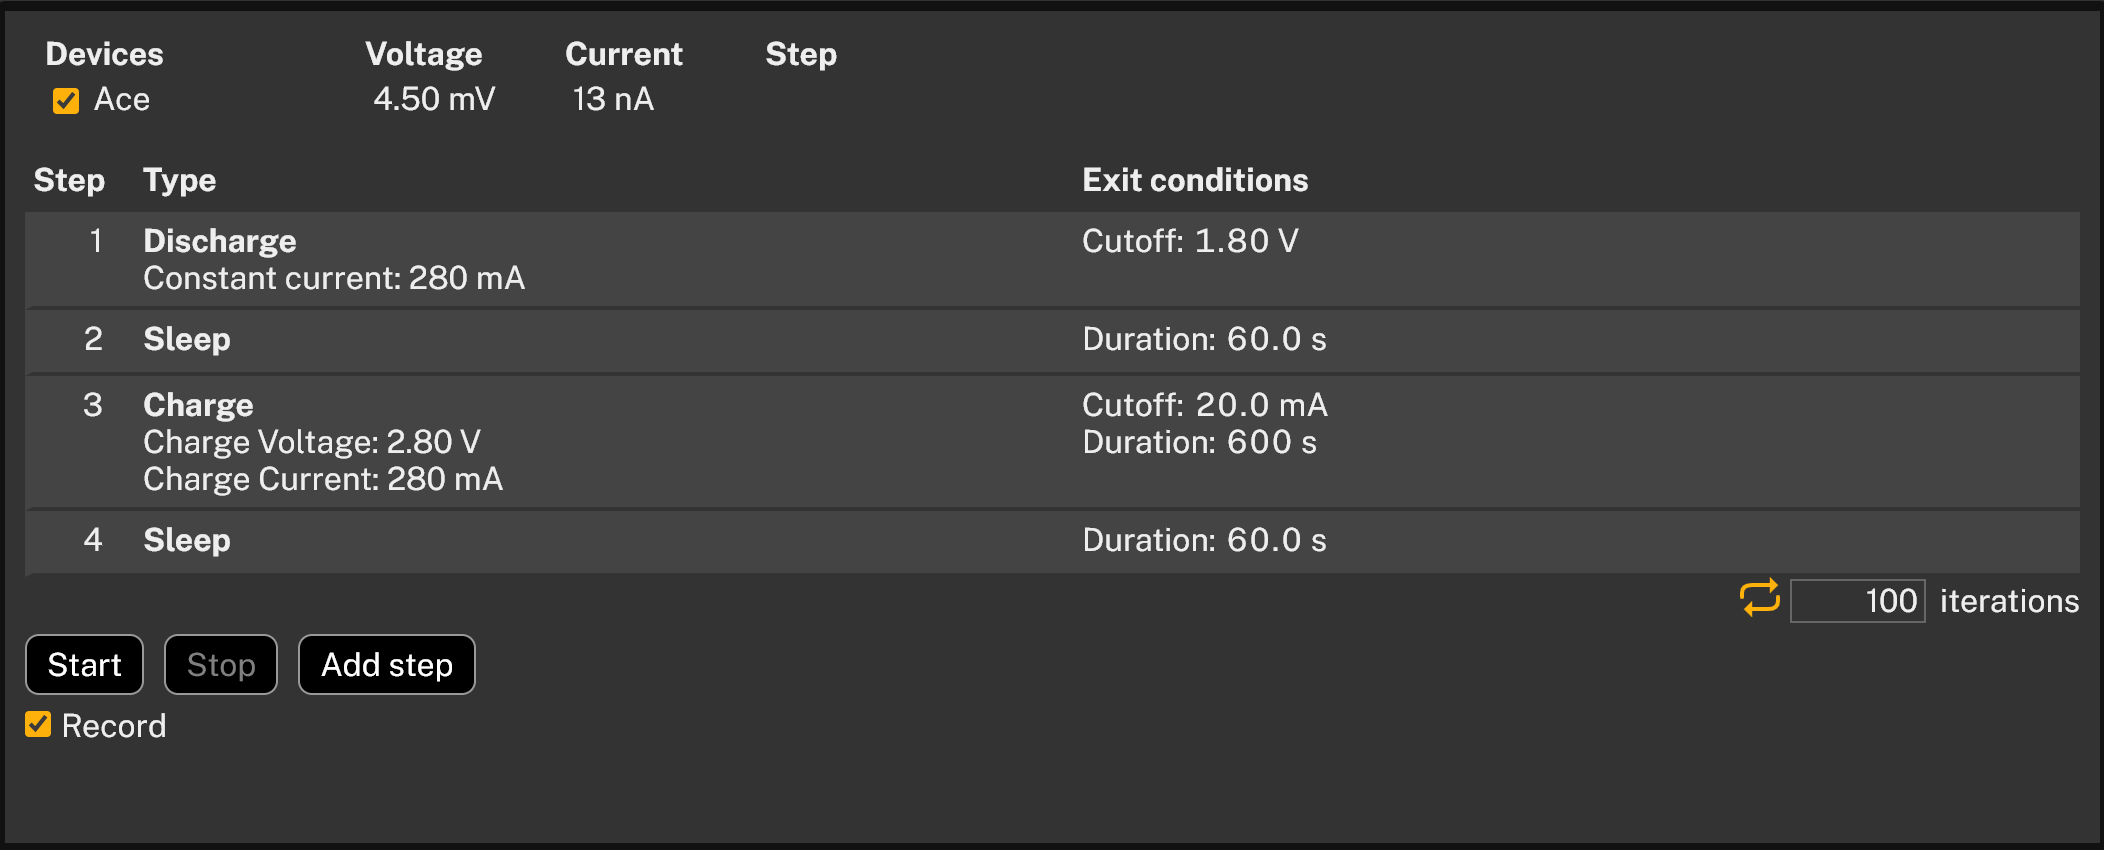
- Click on the tab Battery Validation
Depending on the use case, you will add charging step(s), discharging step(s) and/or sleep step(s). The steps will be described separately below and then they can be combined in any way.
Charging
- Click Add step
- Select Charge tab.
- Set Charge voltage, do NOT exceed battery datasheet max charge voltage.
- Set Charge current, do NOT exceed battery datasheet max charge current.
- Set Cutoff current, this can also be found in the battery datasheet. When the charging current falls below this value, the charging step ends.
- Set Max time, this is the maximum time the charging step will continue, if no other exit conditions are met before.
- Charging will be performed in a CCCV mode. This means that in the beginning of the charging phase, a Constant Current (CC) of Charge current will be used until the voltage reaches the Charge voltage setting, then it will switch to Constant Voltage (CV) and the charging current will drop, until the current falls below Cutoff current setting, or Max time is reached.
- Click Add step
 Do not exceed your battery datasheet as this can be dangerous!
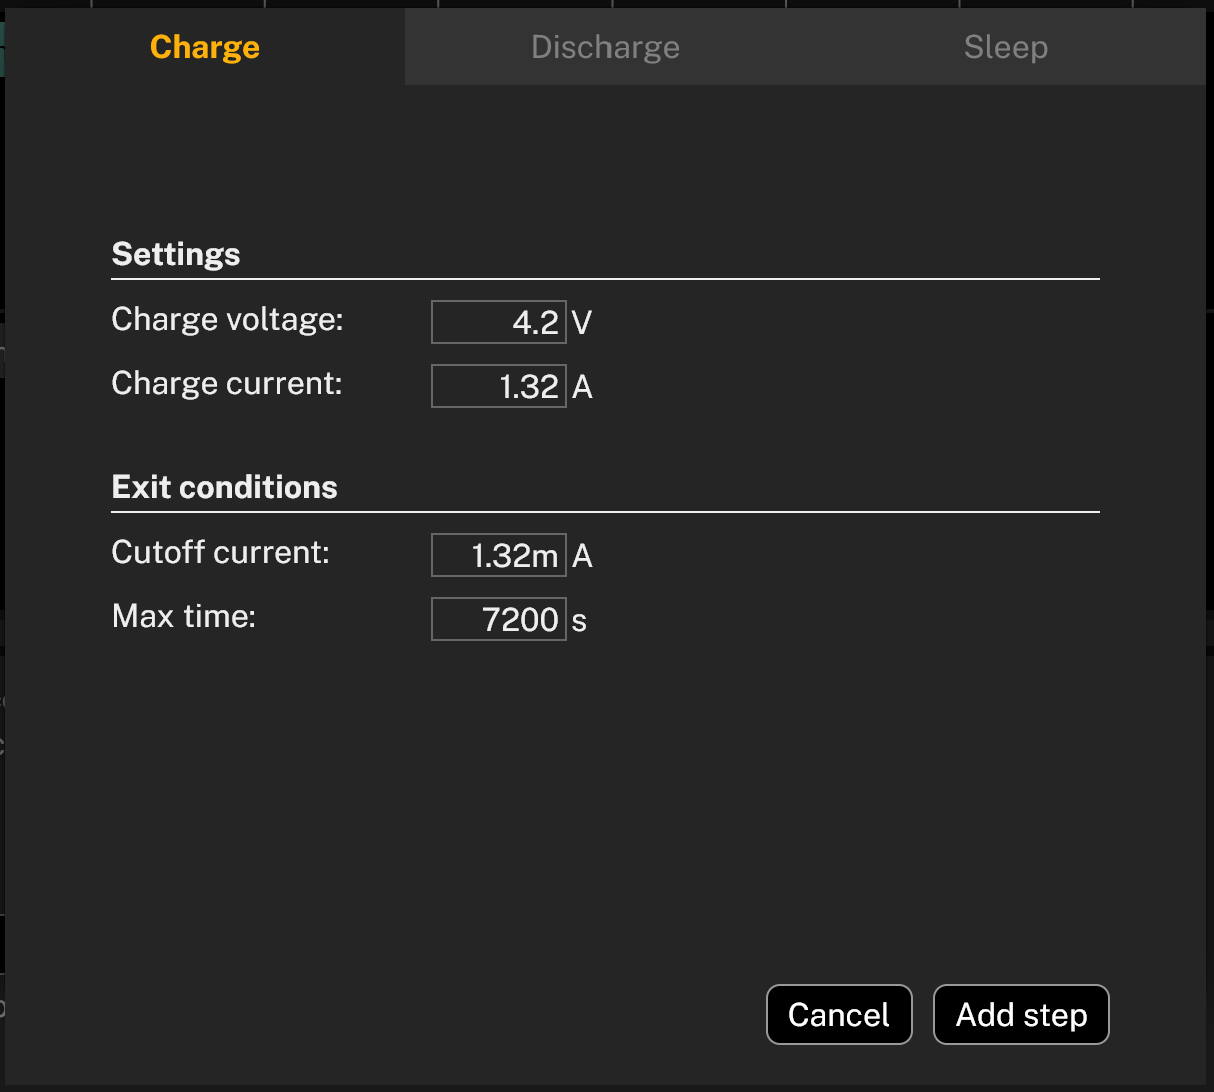
Discharging
One step
- Click Add step.
- Select Discharge tab.
- Select One step.
- Select if the discharge should be in Constant current, Constant power or Constant resistance mode.
- Set at what current, power or resistance the battery will be discharge with.
- Select at what Cutoff voltage the discharge should stop.
- Optionally, select a Time limit
- Click Add step

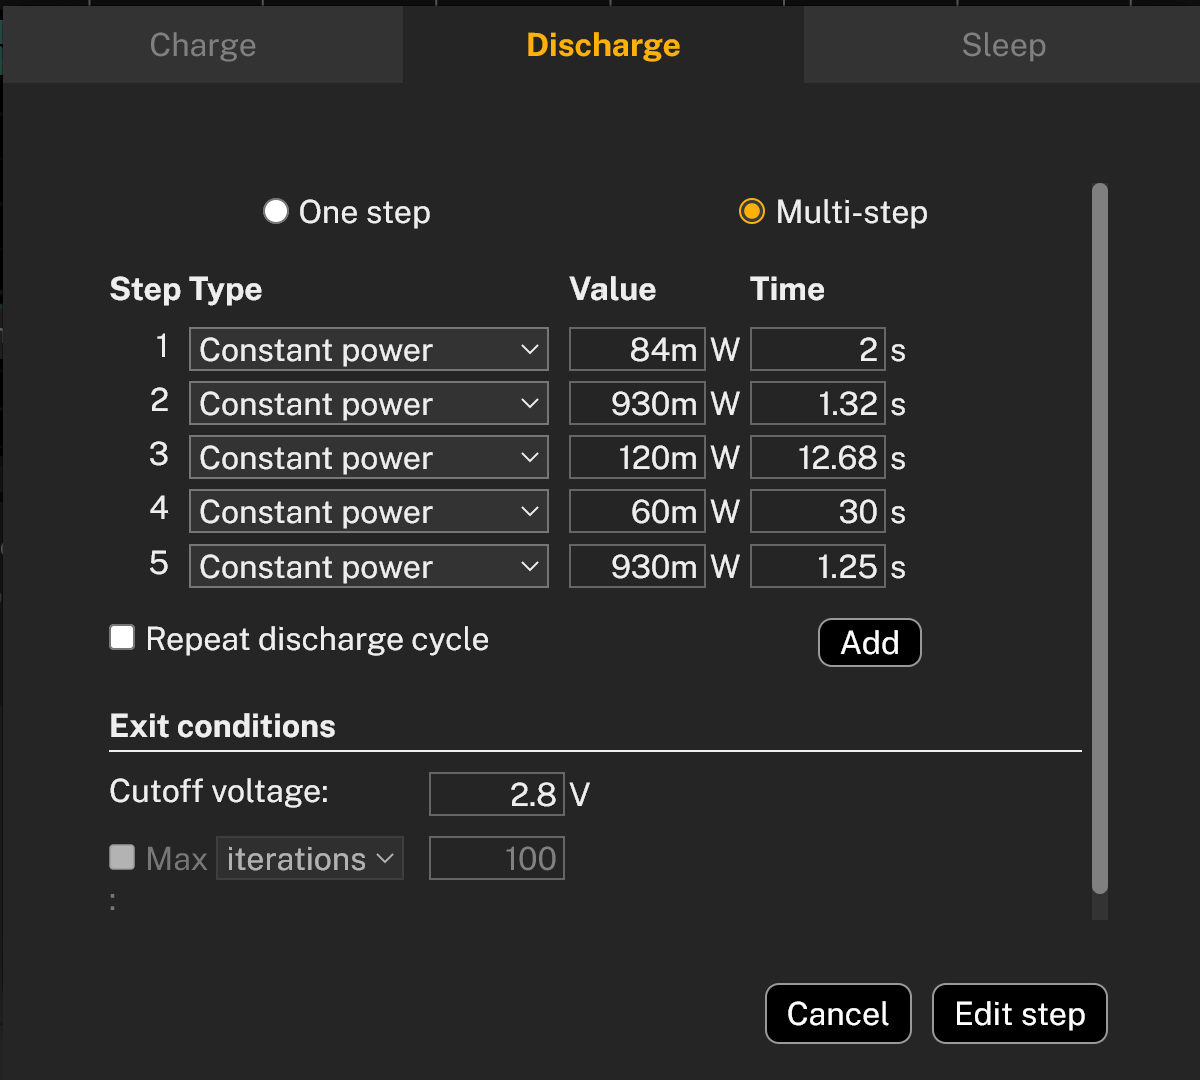
Multi-step
- Click Add step.
- Select Discharge tab.
- Select Multi-step.
- Select, for each step, if the discharge should be in Constant current, Constant power or Constant resistance mode.
- Set at what current, power or resistance the battery will be discharge with.
- Select for how long time this step will be performed. Shortest time is 1ms.
- Click Add to add another step and repeat step 4-6.
- Optionally, select if the steps added should be repeated or performed once.
- Select at what Cutoff voltage the discharge should stop. When this voltage is reached, the entire Discharge step is stopped.
- Optionally, if Repeat discharge cycle is selected, there can be another exit condition, not only the voltage level. Select if the second exit condition should be number of iterations or if there should be a maximum time.
- Click Add step
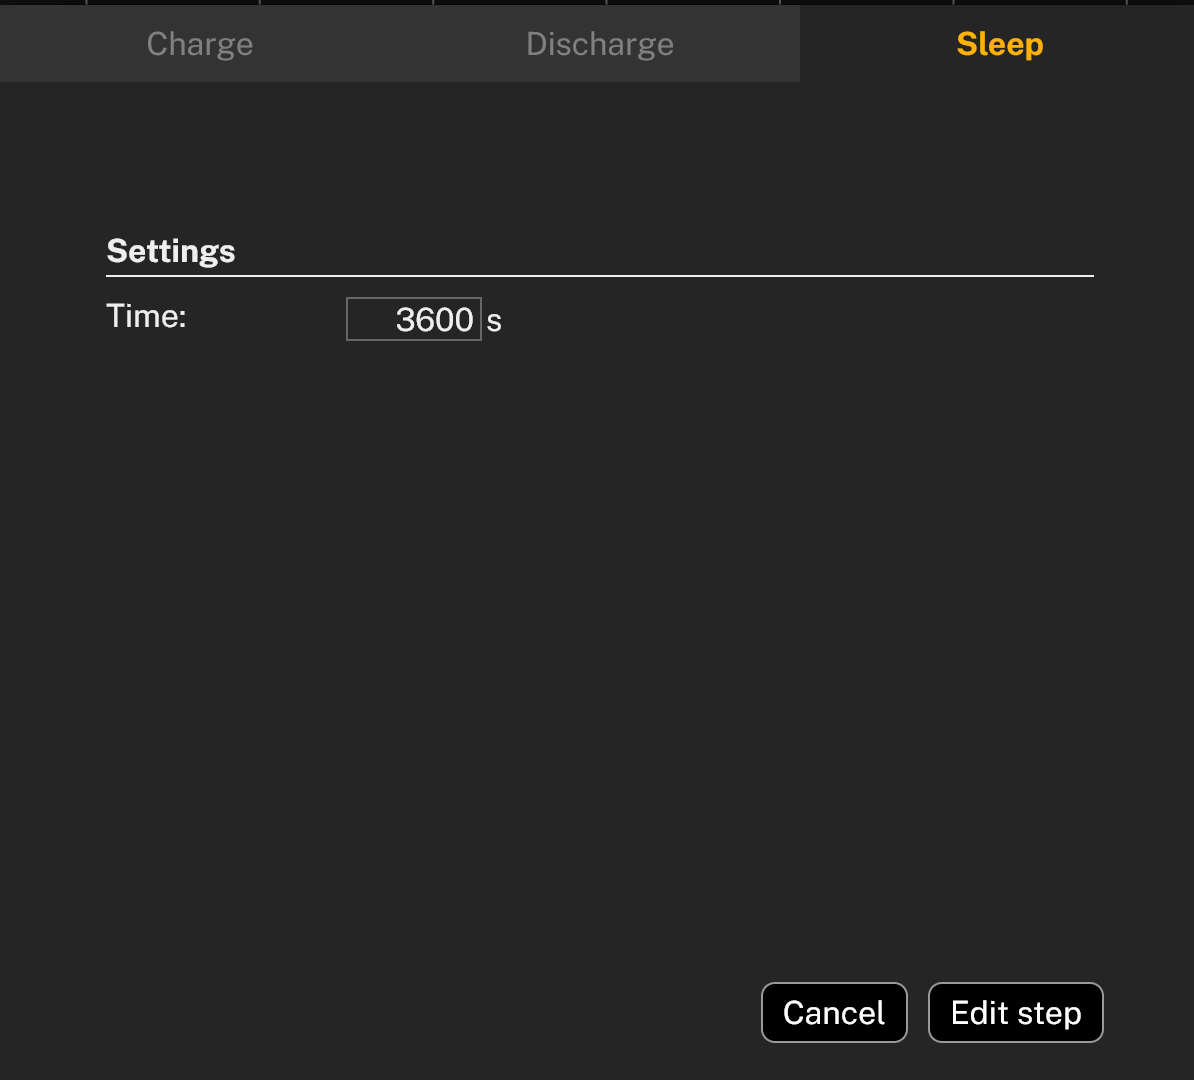
Sleep step
- Click Add step.
- Select Sleep tab.
- Select for how long time the sleep step should be. In this state, the relay of the Otii Ace Pro is closed, but no current is flowing. This will be a step for the battery to recover after discharging or charging.
- Click Add step
Repeating all steps
Optionally, when all steps have been set, it is possible to repeat them a number of times. If this is wanted, like for a cycling test of rechargeable batteries, then click on the Repeat sign and enter how many iterations that are going to be performed.