Battery profiling
Characterize your battery
Profiling a battery is essential in product development because it provides the foundation for accurately modelling and predicting real-world performance. By characterizing the battery during controlled discharge, capturing internal resistance and open circuit voltage at different points, you create a detailed data file of how the cell behaves across its operating range. This data reveals how voltage drops under load, how efficiency changes with state of charge, and where performance bottlenecks may occur
When the battery profiling has finished, it generates a file that is possible to use in Battery Emulation.
The generated battery profile consists of information about:
- Total battery capacity
- Internal resistance
- Open Circuit Voltage
Products needed
One or more Otii Arc Pro or Otii Ace Pro
One or more batteries
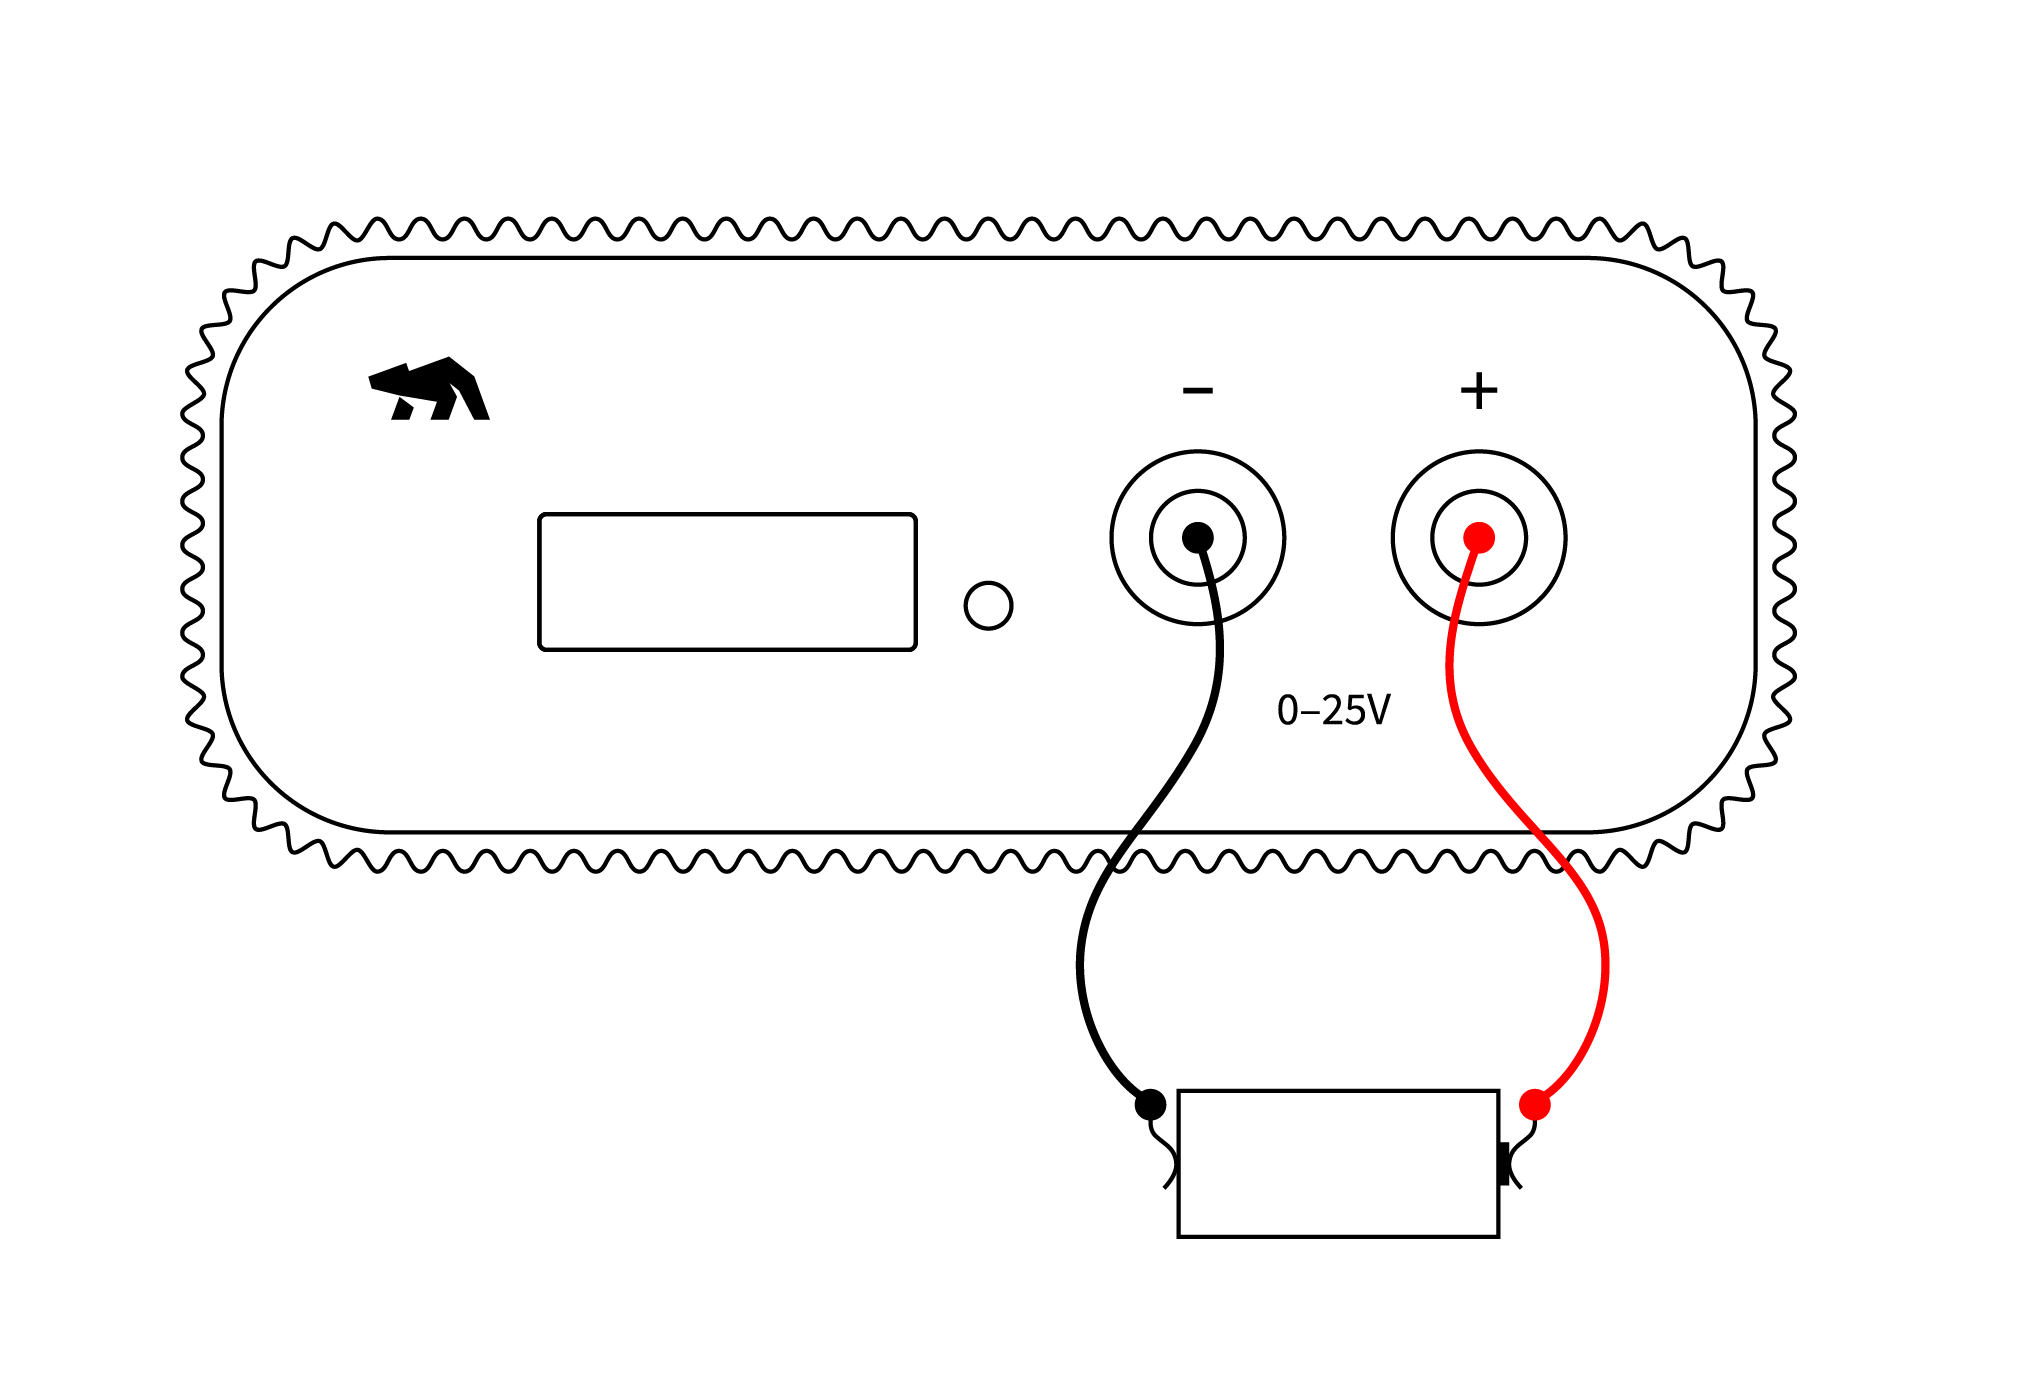
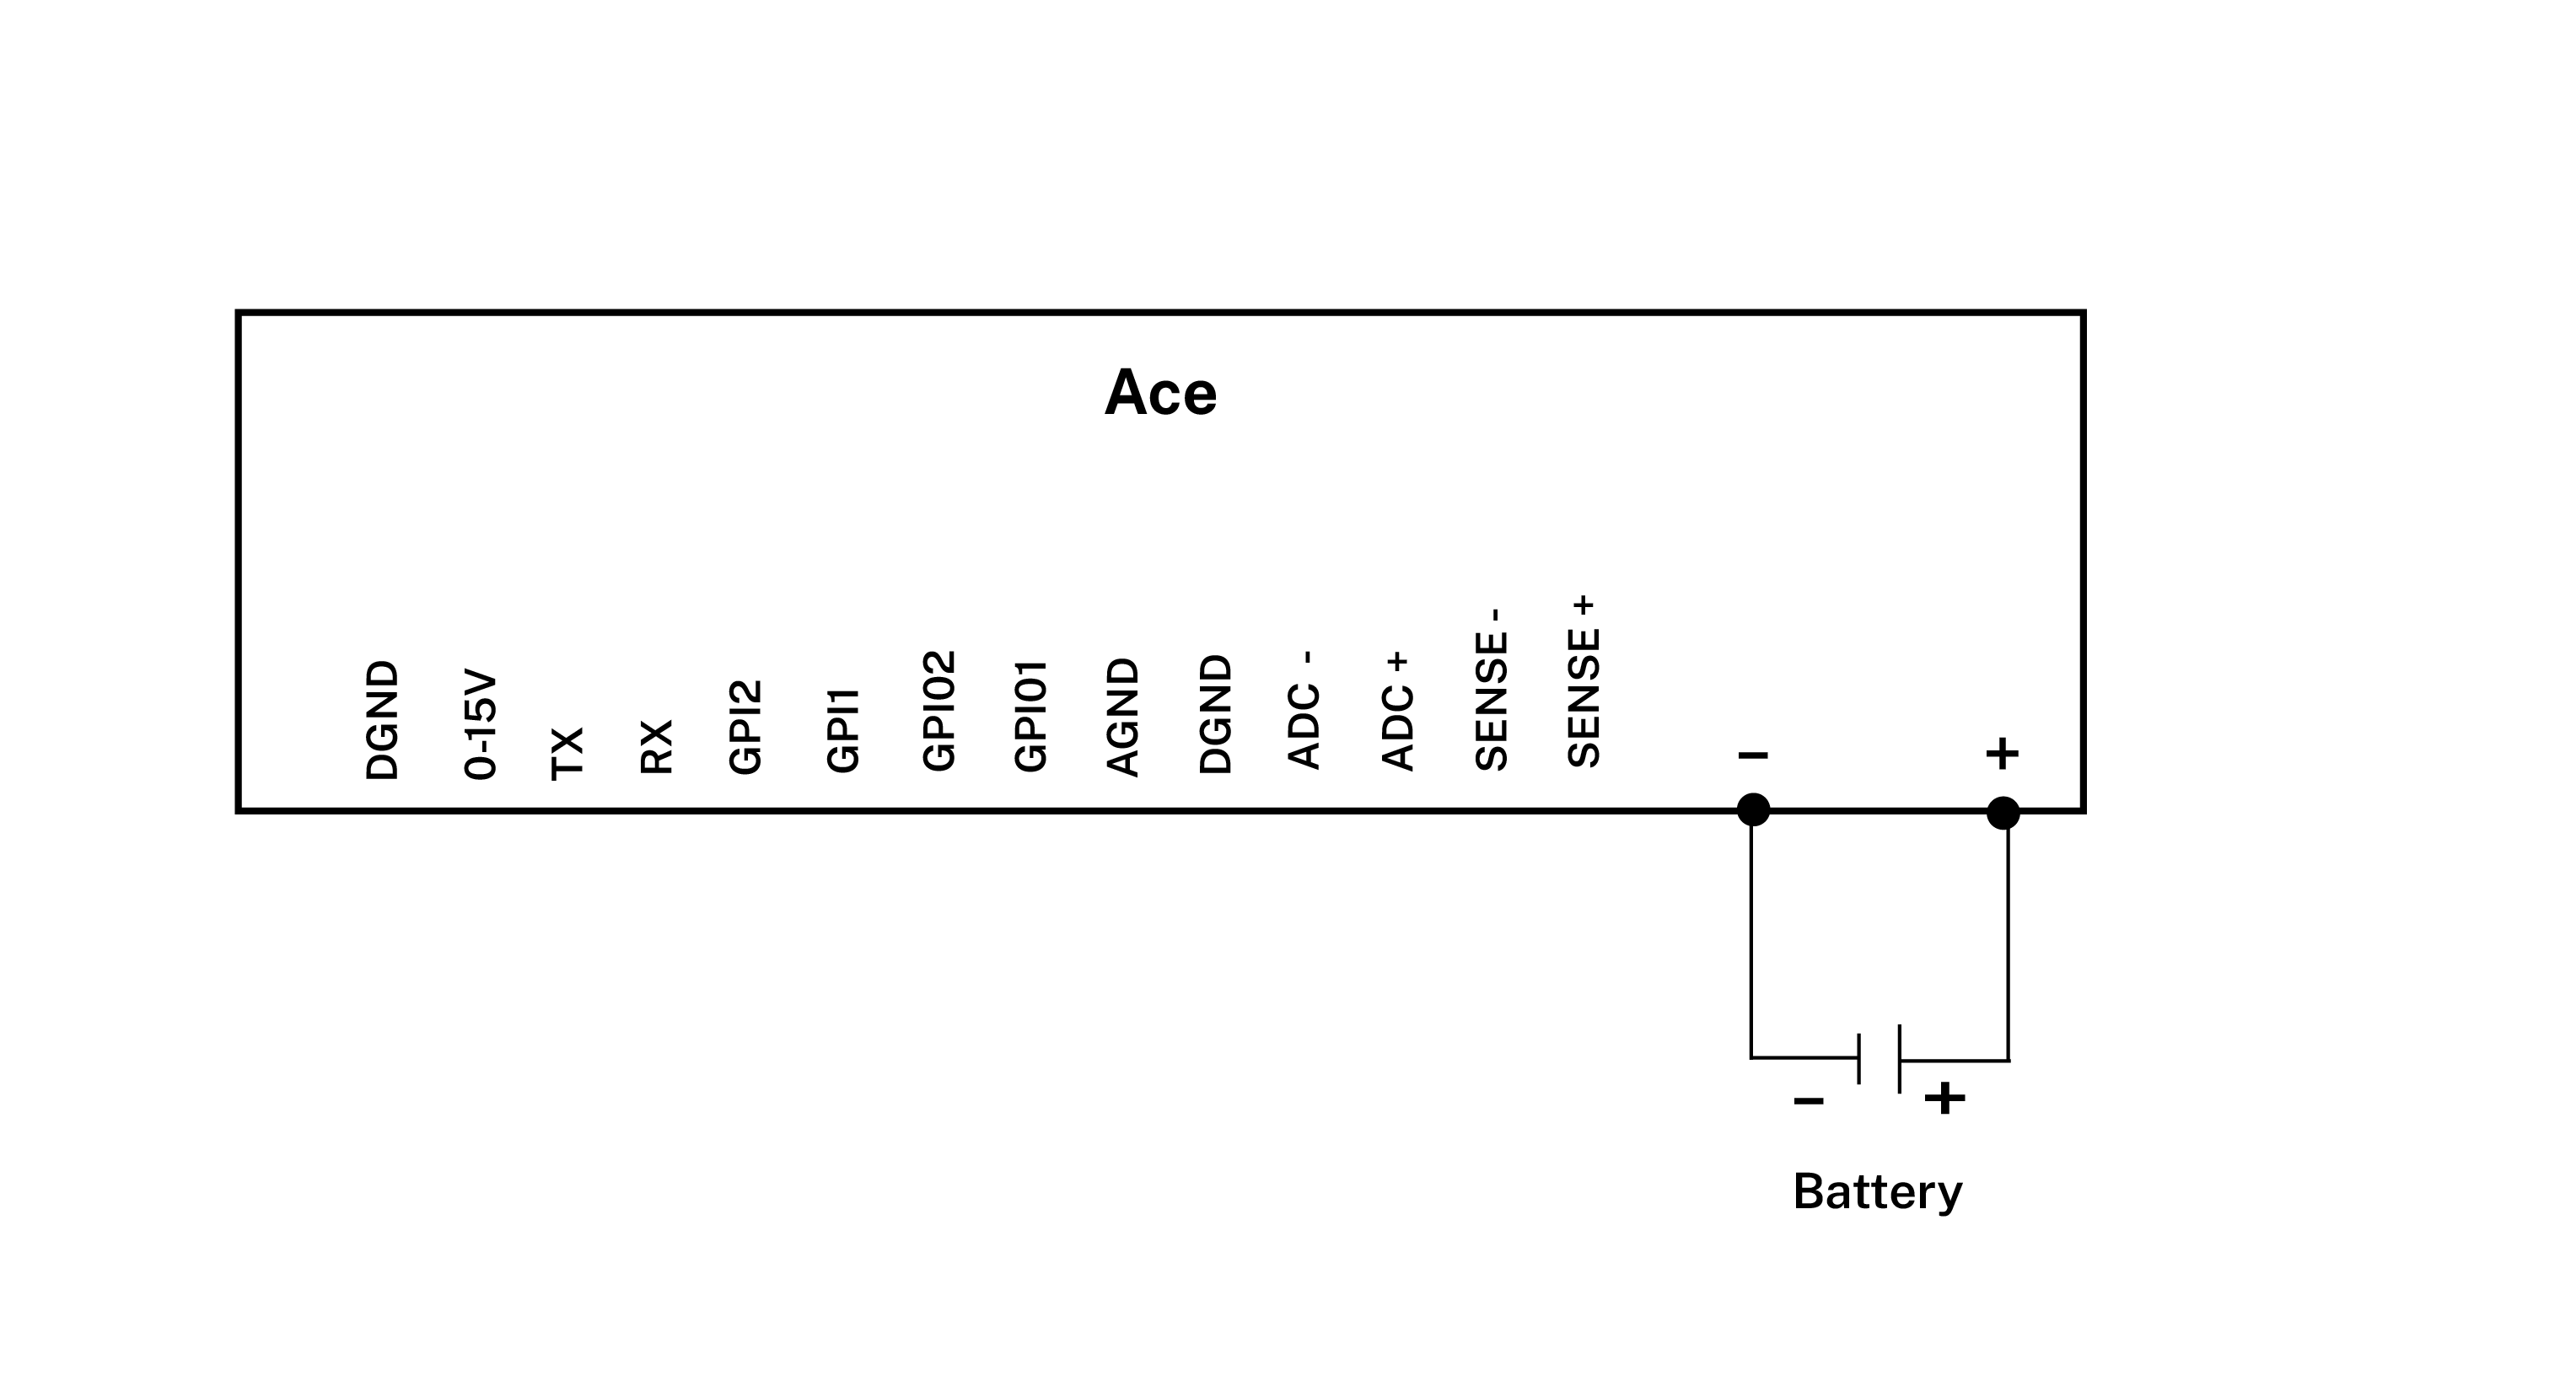
How to connect
- Repeat step 2-5 for each Arc/Ace that is to be used. Several Arc/Aces can be used at the same time to test several batteries in parallel.
- Connect the Arc/Ace to your computer by USB.
- Connect the Arc/Ace’s banana connector + to the positive battery connector.
- Connect the Arc/Ace’s banana connector – to the negative battery connector.
- Optional. For 4-wire connection, connect battery positive pole to SENSE+ and battery negative pole to SENSE- and finally AGND to SENSE-/negative battery connector.
Get started in the Otii application
- Repeat step 2-4 for each Arc/Ace that is going to be used.
- Add your Arc/Ace under Control in the sidebar. Rename it if desired (right click).
- Under ‘Channels’ enable main current, main voltage and main power channels. These will be shown as graphs.
- With Ace, set wanted sample rate. Typically, 1000 samples per seconds is enough when profiling a battery since batteries typically have slow response. If a high sample rate is set and a recording is started, there will be a lot of data captured so make sure that there is enough storage on the computer to not interrupt the profiling.
- Click on the tab Battery Profiling.
- Select one or more Arc/Aces that is going to perform the profiling.
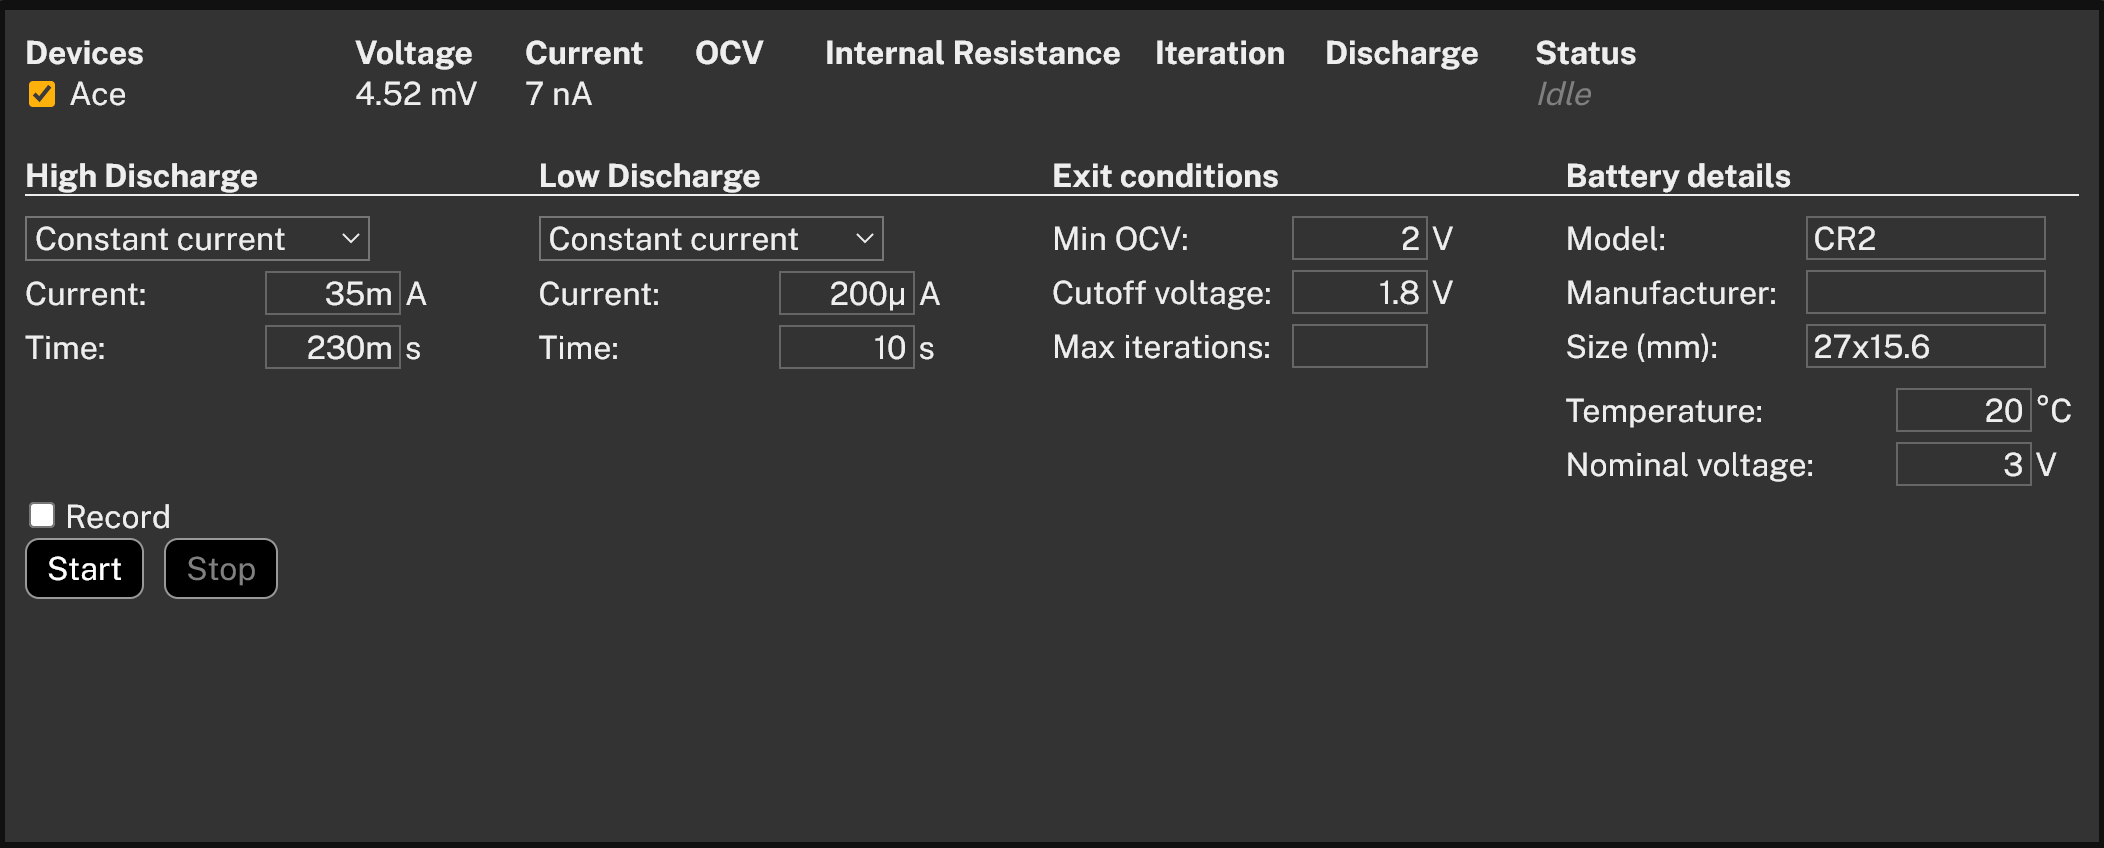
- Select discharge method for the high and low discharge period. Select if the discharge should be constant current, power, or resistance for both the High Discharge and Low Discharge periods. This represents how your device draws energy from the battery. Typically, a LDO draws energy in constant current mode, a DC/DC in constant power mode and a resistive leakage in constant resistance mode
- Input data for the High discharge and the Low Discharge period. Typically, high discharge is the DUT active period and low discharge is the sleep period, but if the discharge time is long, this needs to be accelerated by shortening the low period and possibly increase the sleep current. There must be a difference in the High discharge, and Low Discharge and High Discharge must be higher than Low discharge. This to be able to calculate the internal resistance of the battery.
- Input data for when the battery profiling is to be stopped, there are three possible exit condition and if one of them are met, then the profiling stops.
- Min OCV is the calculated Open Circuit Voltage (OCV) of the battery. It is not necessary to have a 0 load to be able to react on OCV as this is a calculated value based on the measured battery data.
- Cutoff voltage is the measured battery pole voltage, most likely this will be triggered during the high discharge period.
- Max iterations are if you would like to limit the number of iterations. If you do not want to limit the number of iterations, just leave this field empty.
- Input the Battery details data like the model, manufacturer and size of the battery. This is just for your information, to remember what battery that was profiled. The profile name will also be taken from the data that is entered here.
- Input what temperature the battery was profiled in. It is good to have the battery profiled in the different temperatures that it will be subjected to in the real use case. If a temperature chamber is used, make sure to only put the battery inside the temperature chamber, not the Arc/Ace.
- Input the battery datasheet nominal voltage of the battery.
- Select if you want to have a recording ongoing during the battery profiling. This is not needed; the battery data is being measured anyways. You can also manually start and stop the recording as the profiling continues, but if you start the recording manually, you must also stop it manually.
- Click Start button to start the battery profiling and then wait for it to finish. Make sure that the computer does not enter sleep mode or restart during the test, or the battery profiling will be interrupted.
- In the Devices field, there will be updated the OCV, Internal resistance, Iterations, and discharged capacity when a complete iteration of high and low has been performed. Here you can see the progress of the battery profiling and the measured and calculated values.
- When any of the exit conditions are met, the profiling will stop. If you have several Arc/Aces discharging several batteries, they will be stopped independently from each other. When it is stopped, the relay opens for that Arc/Ace and a button “Save profile” appears. Click this to save the generated battery profile. The measured battery profiling data is also stored in the active project.
Tips & tricks
 If you discharge a higher energy battery with Ace, remember that the maximum continuous discharge power is 15W. If you exceed this, the profiling might be interrupted due to overtemperature.Make sure that the computer does not enter sleep mode or restart during the test, or the battery profiling will be interrupted.