Differential measurements with Otii Arc and Ace
Current and voltage differential measurements
This setup works with both Otii Arc and Otii Ace. It enables current and voltage measurements without using the Otii’s internal power supply. Instead, the DUT is powered by an external supply and measurements performed through an external shunt resistor. This way, the Otii’s internal power output remains available for use as a separate power source or measurement channel elsewhere in your setup.
This use case is similar to the Subsystem power measurement but without using the main channel.
For Otii Ace, if the main channel is not used for anything else, we recommend using the In-line mode/Ampere meter mode with voltage measurement via SENSE.
Products needed
Shunt resistor R
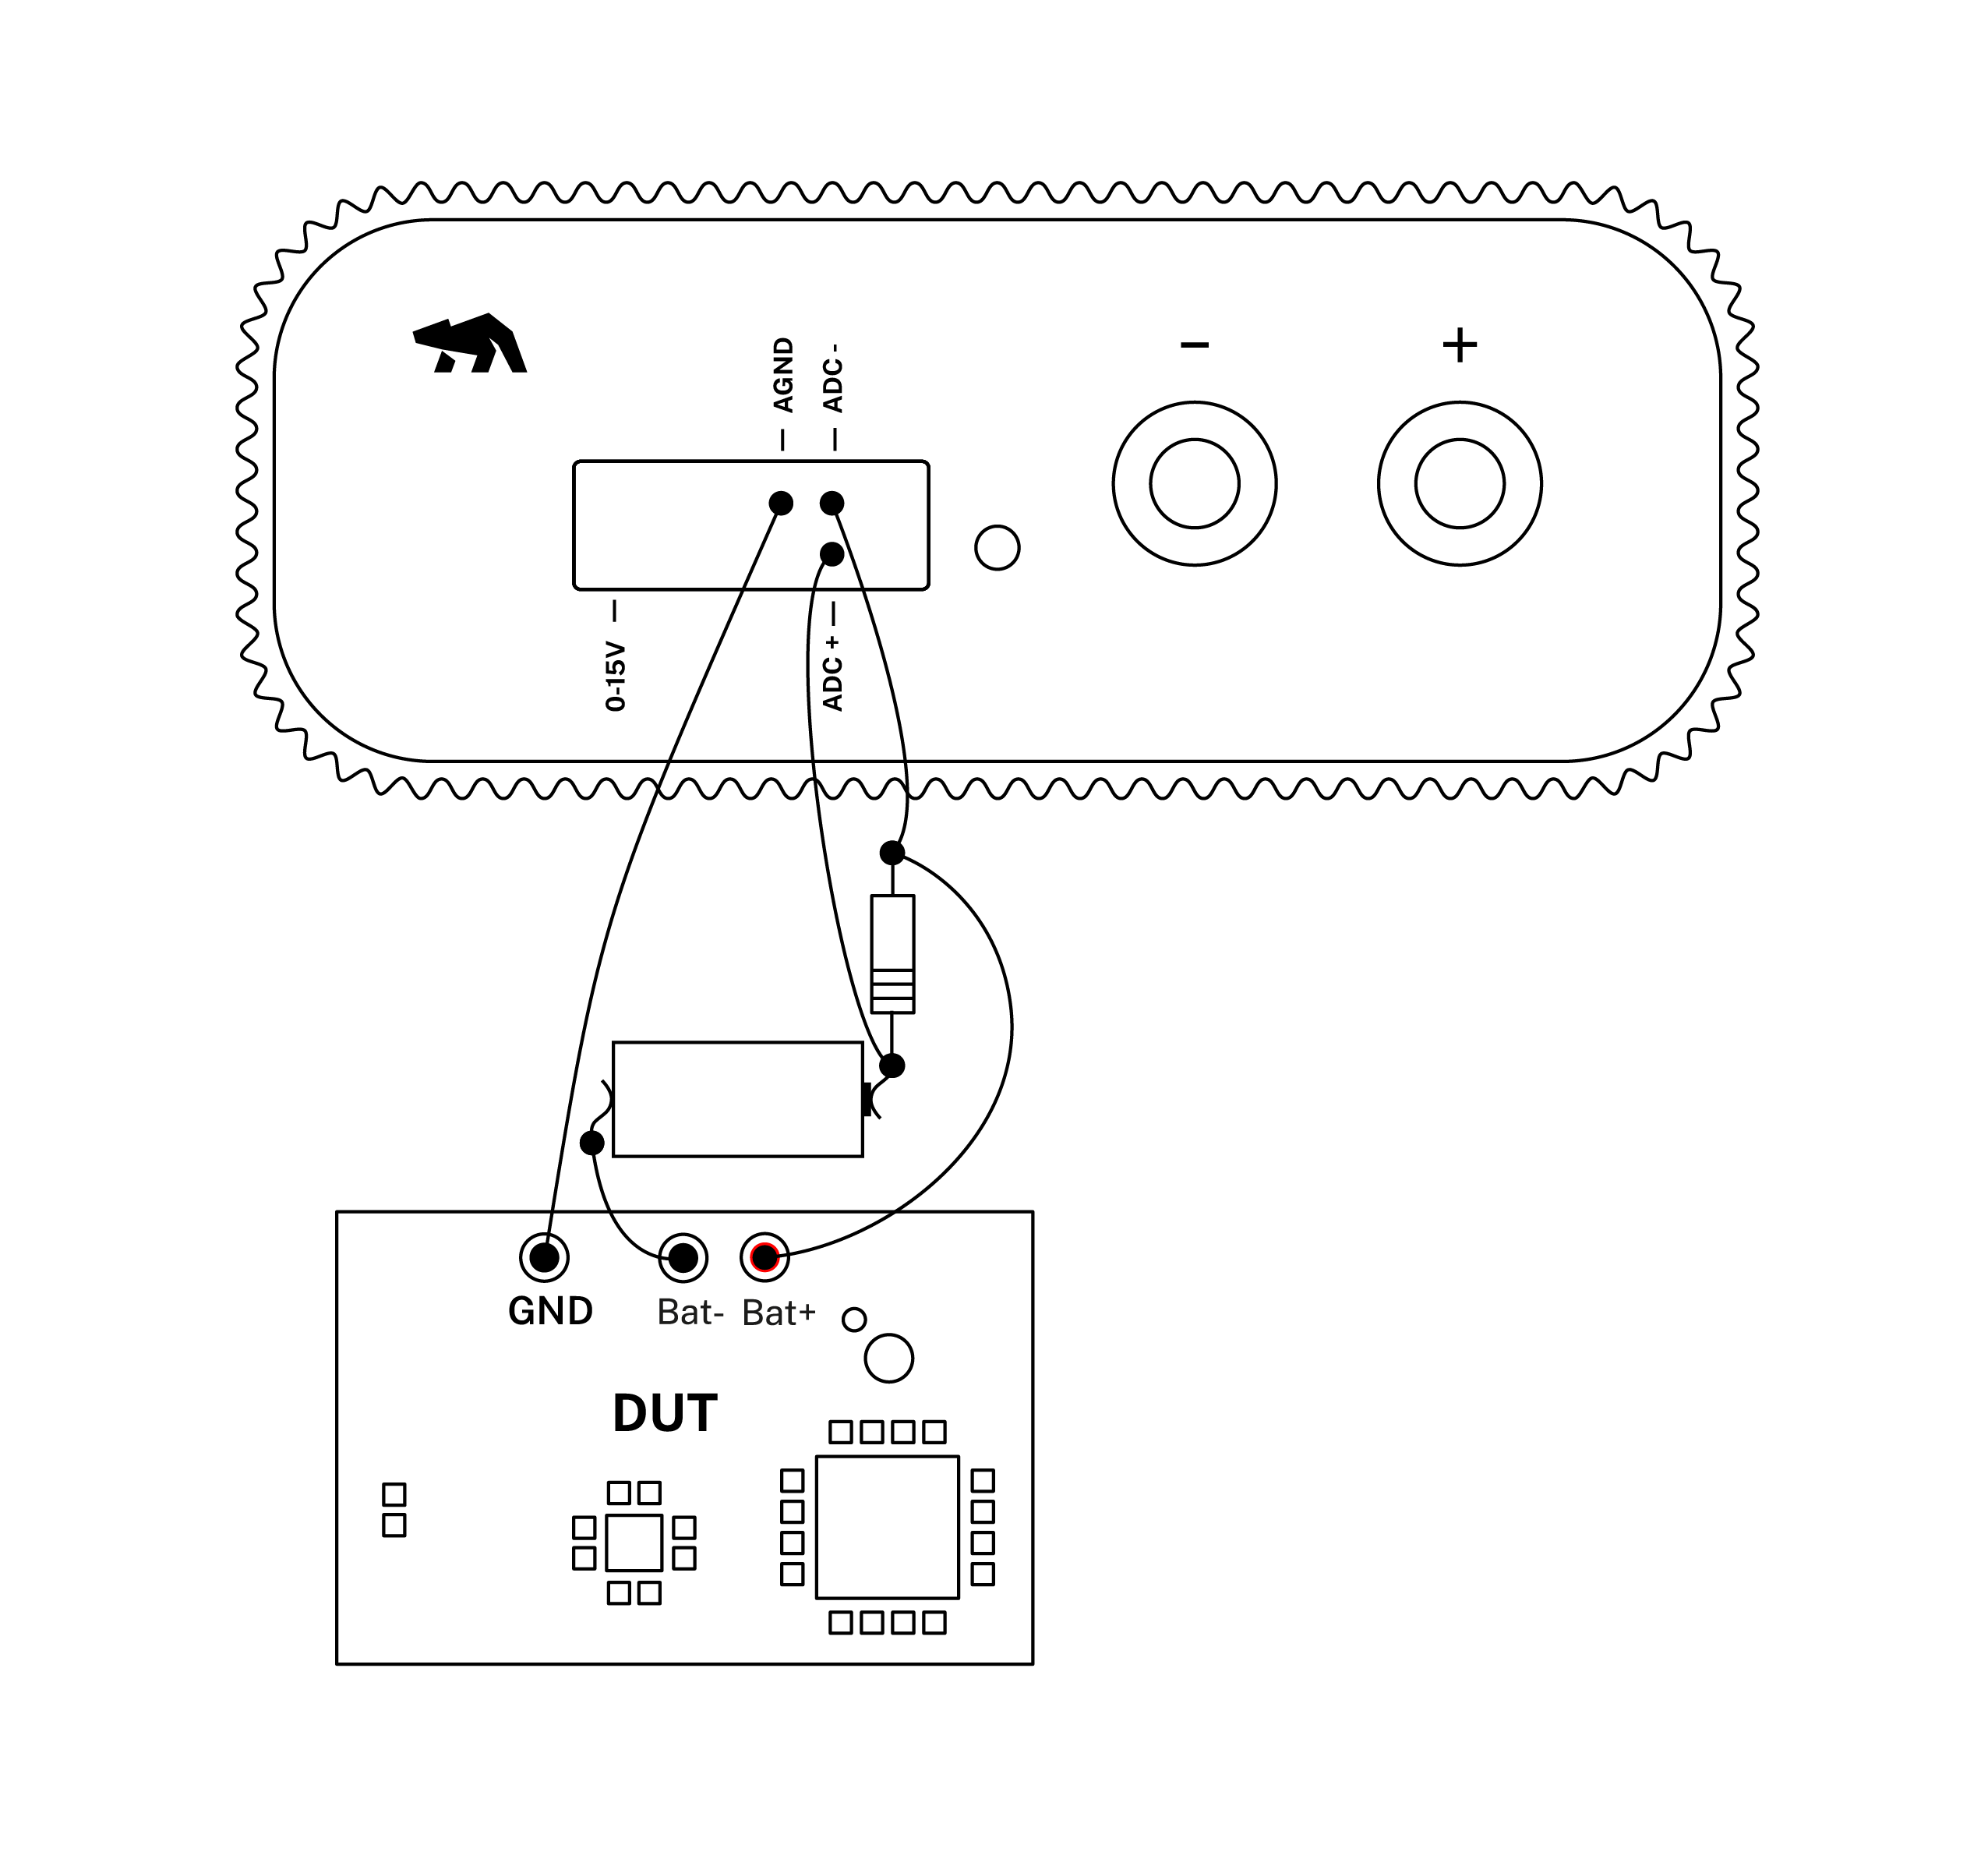
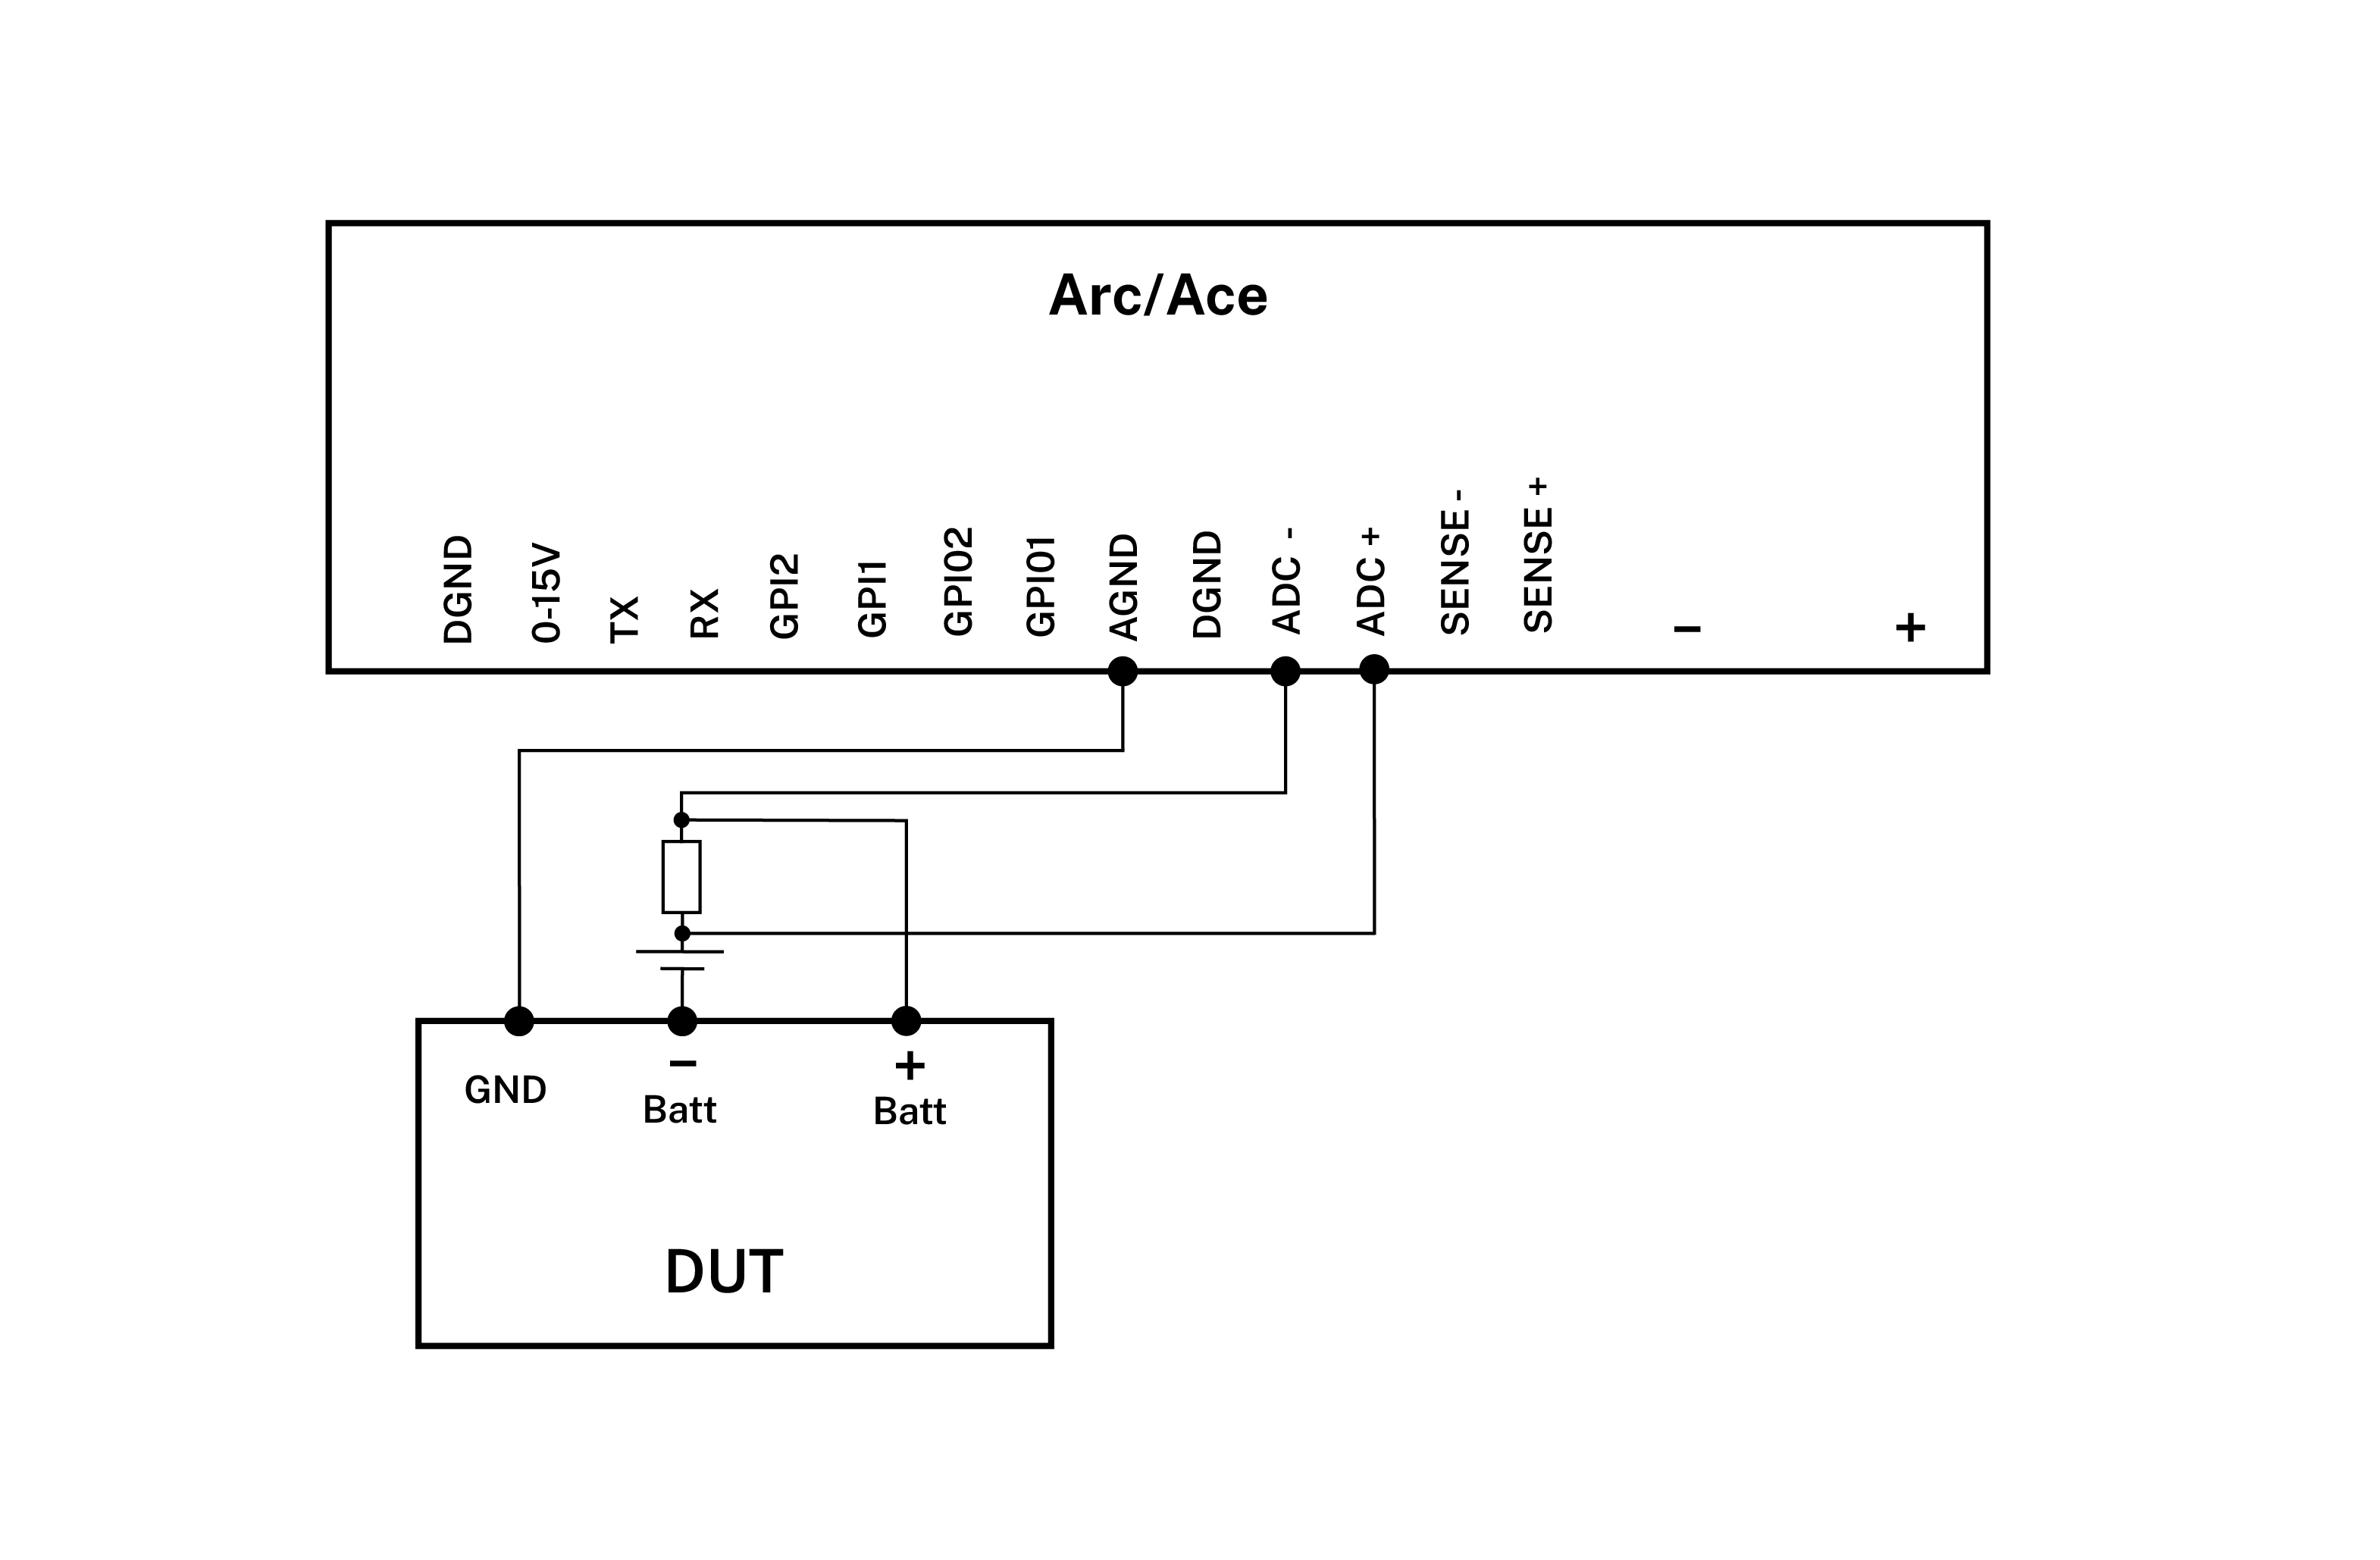
How to connect
- Connect Arc/Ace to your computer by USB. If needed add a power supply.
- Connect an external shunt resistor R in series with battery/energy harvester positive pole and DUT's positive battery connector/power connector.
- The value R must be calculated so the voltage drop over R is less than Arc/Ace data sheet value for differential voltage measurement.
- Connect ADC+ to the high side of the shunt resistor, this will also be the voltage measurement point.
- Connect ADC- to the low side of the shunt resistor.
- Connect DUT negative battery connector / power connector to battery / energy harvester negative pole
- Connect AGND to DUT’s GND
Get started in the Otii application
- Add your Arc/Ace under ‘Control’ in the sidebar.
- Set value of R in ADC resistor
- Enable ADC current, ADC voltage and ADC power channel
- Start a recording
