Battery profiler
 This feature requires a Battery Toolbox License.
In addition to source current, the Otii instruments can be set to sink current. E.g. by connecting a battery to the main connectors, you can test how the battery performs with different kind of loads.
To get started with battery profiling, choosing Battery Profiler from the toolbar will open the following pane:
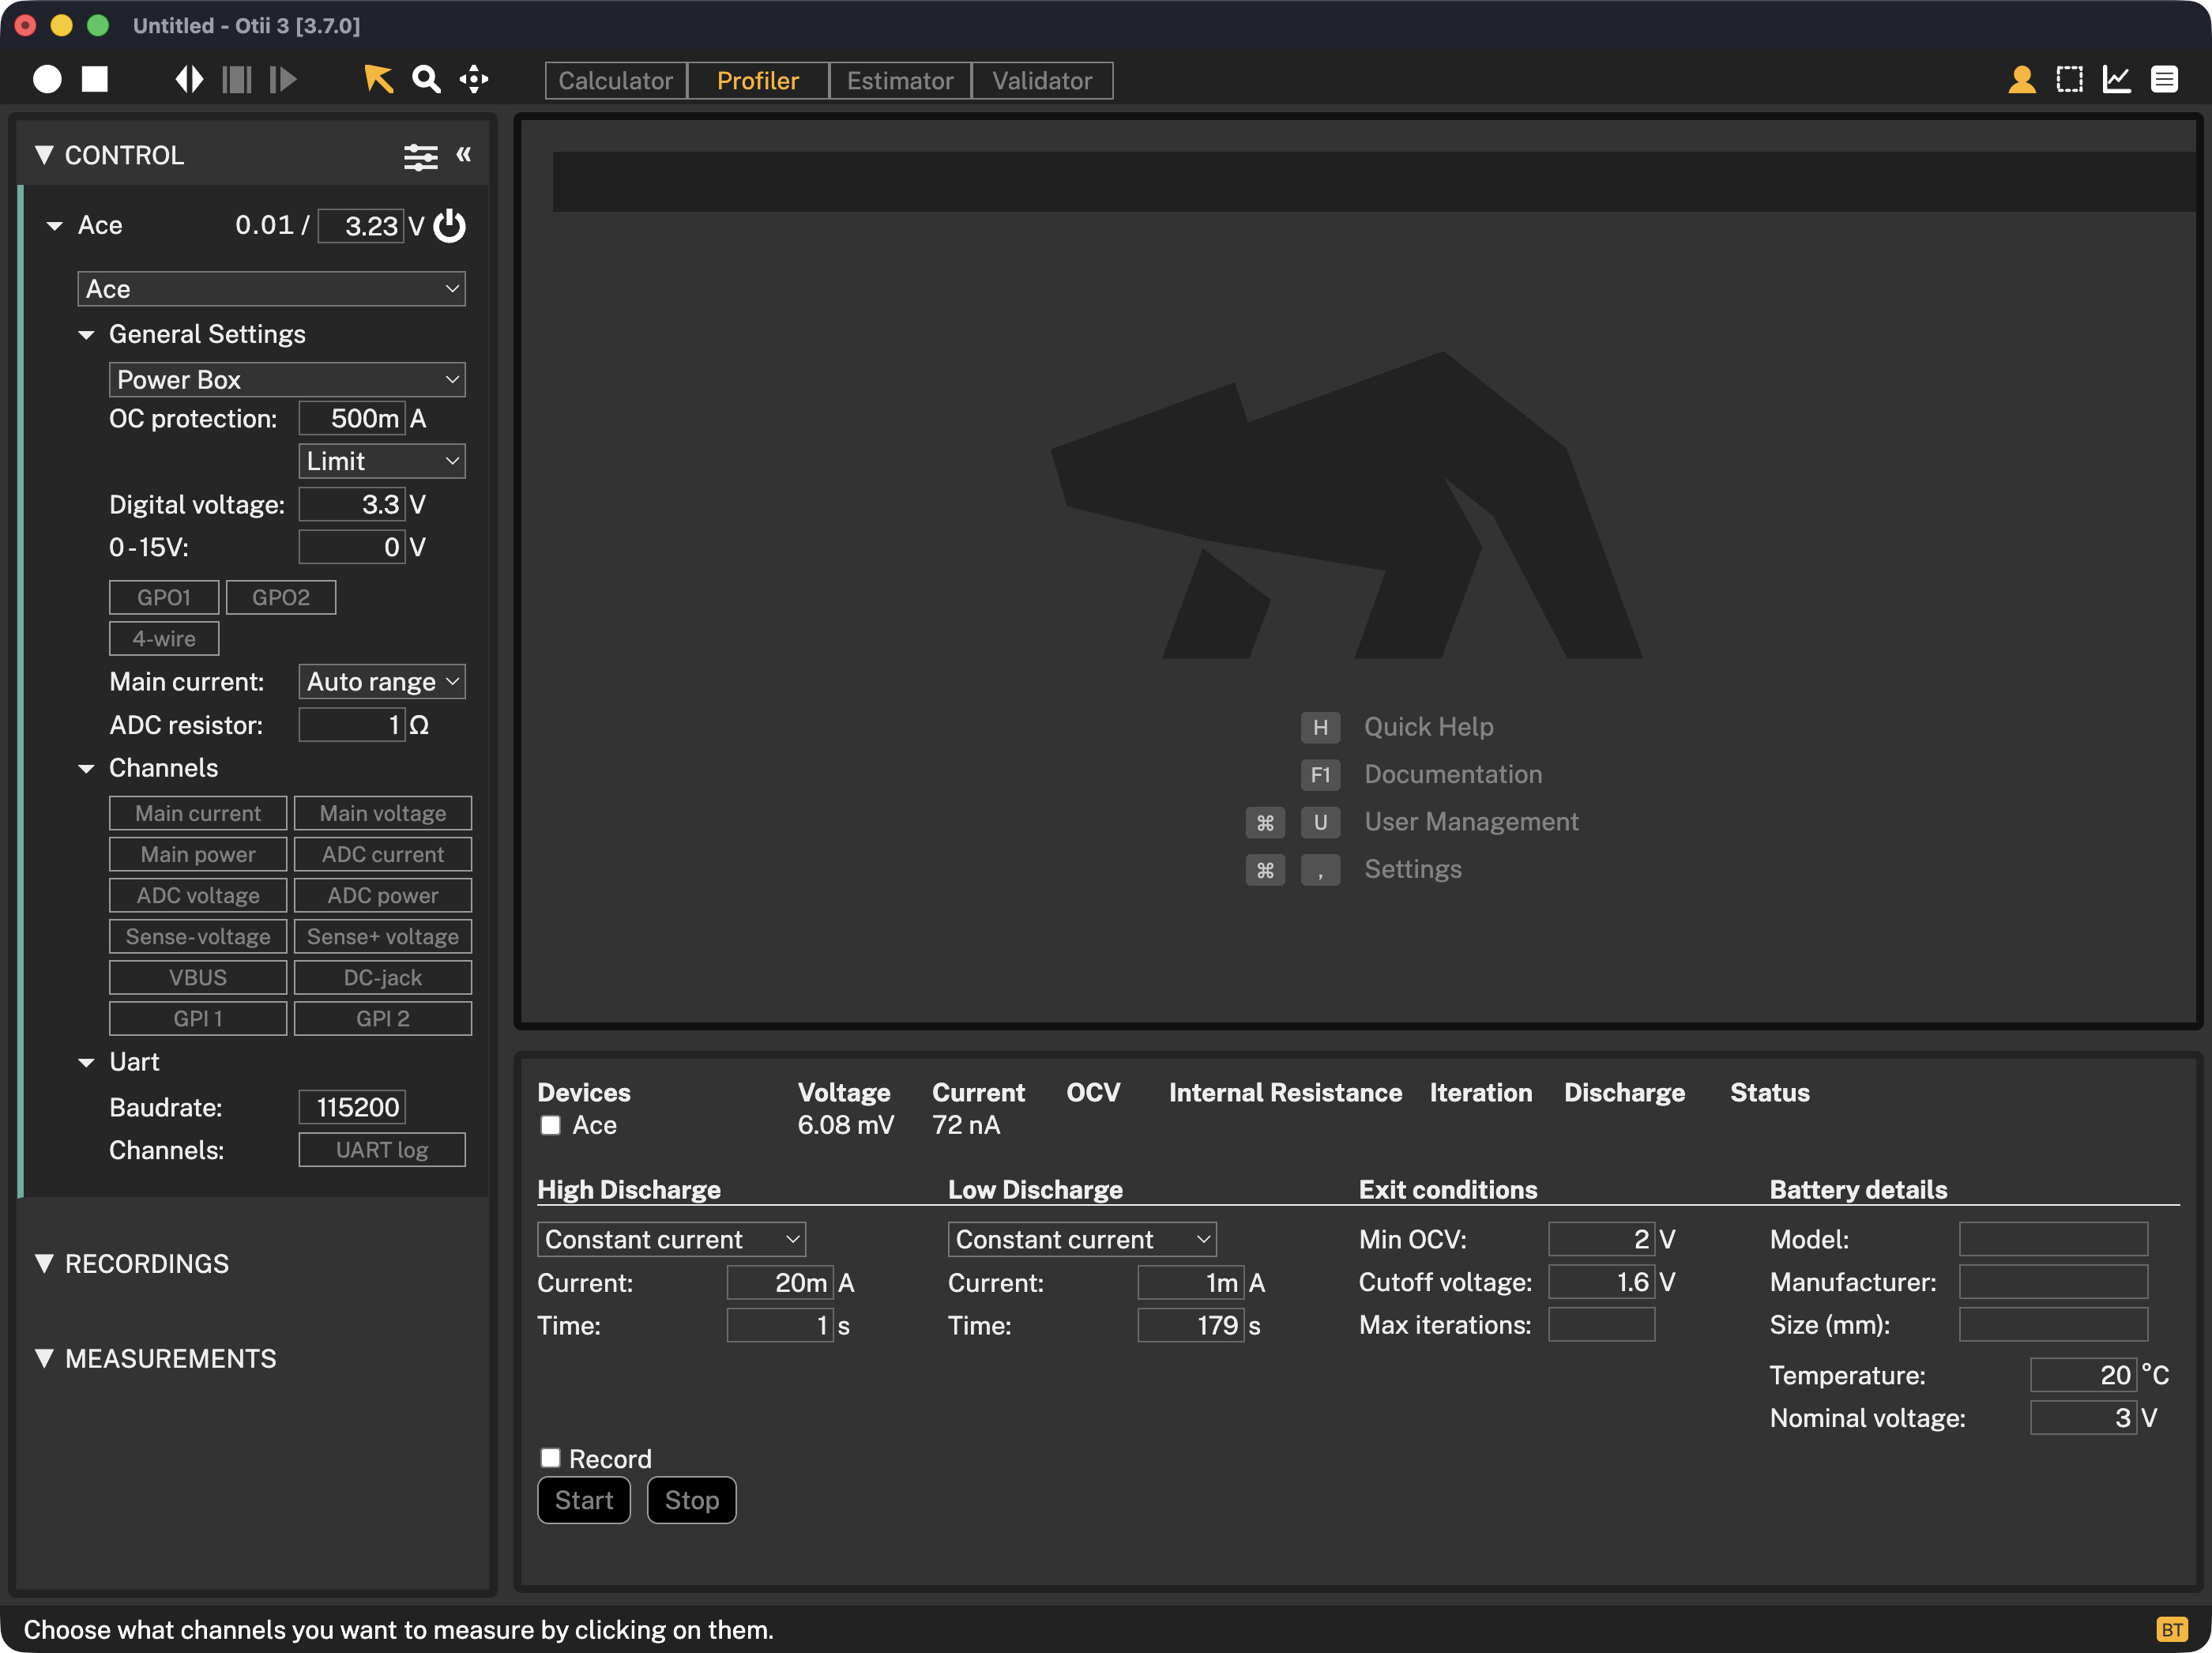
Configuration
Devices
Here you choose which of your connected devices you want to use for battery profiling. When the profiling is running you will see some information of the current status of the profiling for each device.
Profiling Settings
Here you configure the profiling parameters, see more below on some best practices in choosing them.
You can also choose to automatically start a recording of the profiling. Recording the profiling session is optional, and for longer profiling sessions will require a lot of free space on your computer.
Battery Details
Here you enter the model, manufacturer and size of the tested battery.
Output
Scroll down the dialog to see a more detailed output from the profiling.
Start
Start is used to start a new profiling.
Stop
Stop is used to stop an ongoing profiling.
Save profile
When any of the exit conditions has been fulfilled, or the stop button has been pressed, a save button will appear after each device allowing you to save the discharge profile for use in the battery emulator. Once the battery discharge profile is saved, it will automatically end up in the Battery Profile Manager, to be used for emulation, analysis, comparison and sharing.

Getting started with battery profiling
- Connect the battery positive pole to the red banana connector (+) and the negative pole to the black banana connector (-)
- Start Otii 3 Desktop App, log in and reserve a Battery Toolbox license
- Open Battery Profiler tab
- Select the Otii Arc/Ace(s) that is going to profile the battery/batteries. It is possible to have several Otii Arc/Aces connected to the same computer to be able to profile several batteries at the same time
- Select if the discharge should be constant current/power or resistance for both the High Discharge and Low Discharge. This represent how your device draws energy from the battery. Typically, a LDO draws energy in constant current mode, a DC/DC in constant power mode and a resistive leakage in constant resistance mode.
- Input data for the High discharge and the Low Discharge period. This could be the active period and the sleep period of your device, how if draws the energy from the battery. There must be a difference in the High discharge and Low Discharge and High Discharge must be higher than Low discharge. This to be able to calculate the internal resistance of the battery.
- Input data for when the battery profiling is to be stopped, there are three possible exit condition and if one of them are met, then the profiling stops.
- Min OCV is the calculated Open Circuit Voltage (OCV) of the battery. It is not necessary to have a 0 load to be able to react on OCV as this is a calculated value based on the measured battery data.
- Cutoff voltage is the measured battery pole voltage
- Max iterations is if you would like to limit the number of iterations. If you do not want to limit the number of iterations, just leave this field empty
- Input the Battery details data like the module, manufacturer and size of the battery. This is just for your information, to remember what battery that was profiled.
- Input what temperature the battery was profiled in. It is good to have the battery profiled in the different temperatures that it will be subjected to in the real use case. Make sure to only put the battery inside the temperature chamber, not the Arc/Ace.
- Input the battery datasheet nominal voltage of the battery.
- Select if you want to have a recording ongoing during the battery profiling. This is not needed, the battery data is being measured anyways.
- Enable Main current and Main voltage channels and set wanted sample rate if a recording is wanted during profiling. Typically, the sample rate is set to 1000 samples per second as batteries has slow response.
- Click Start button to start the battery profiling and then wait for it to finish.
- When battery profiling has met an exit condition, the relay opens and a button “Save profile” appears. Click this to save the generated battery profile. The measured battery profiling data is also stored in the active project.
Why do I get internal resistance warning when profiling a battery
The internal resistance warning is a warning, so the profiling continues regardless.
The warning is that the internal resistance calculation ended up with a negative resistance. To understand this, the theory behind the internal resistance calculation needs to be understood.
Battery profiler discharges the battery with a high discharge pulse and a low discharge pulse. When the switch from high to low happens, the voltage (VH) and current (IH) is measured . Then when the switch back from low to high happens, the voltage (VL) and current (IL) is measured. The internal resistance is then calculated by Ohms law Rint = (VL-VH)/(IL-IH) The currents are negative. If the battery has a lower voltage in the end of the low discharge, than the voltage at the end of the high discharge, Rin will be negative.
To avoid this do the following:
- Have a shorter cycle time
- Have a higher difference between high and low current